
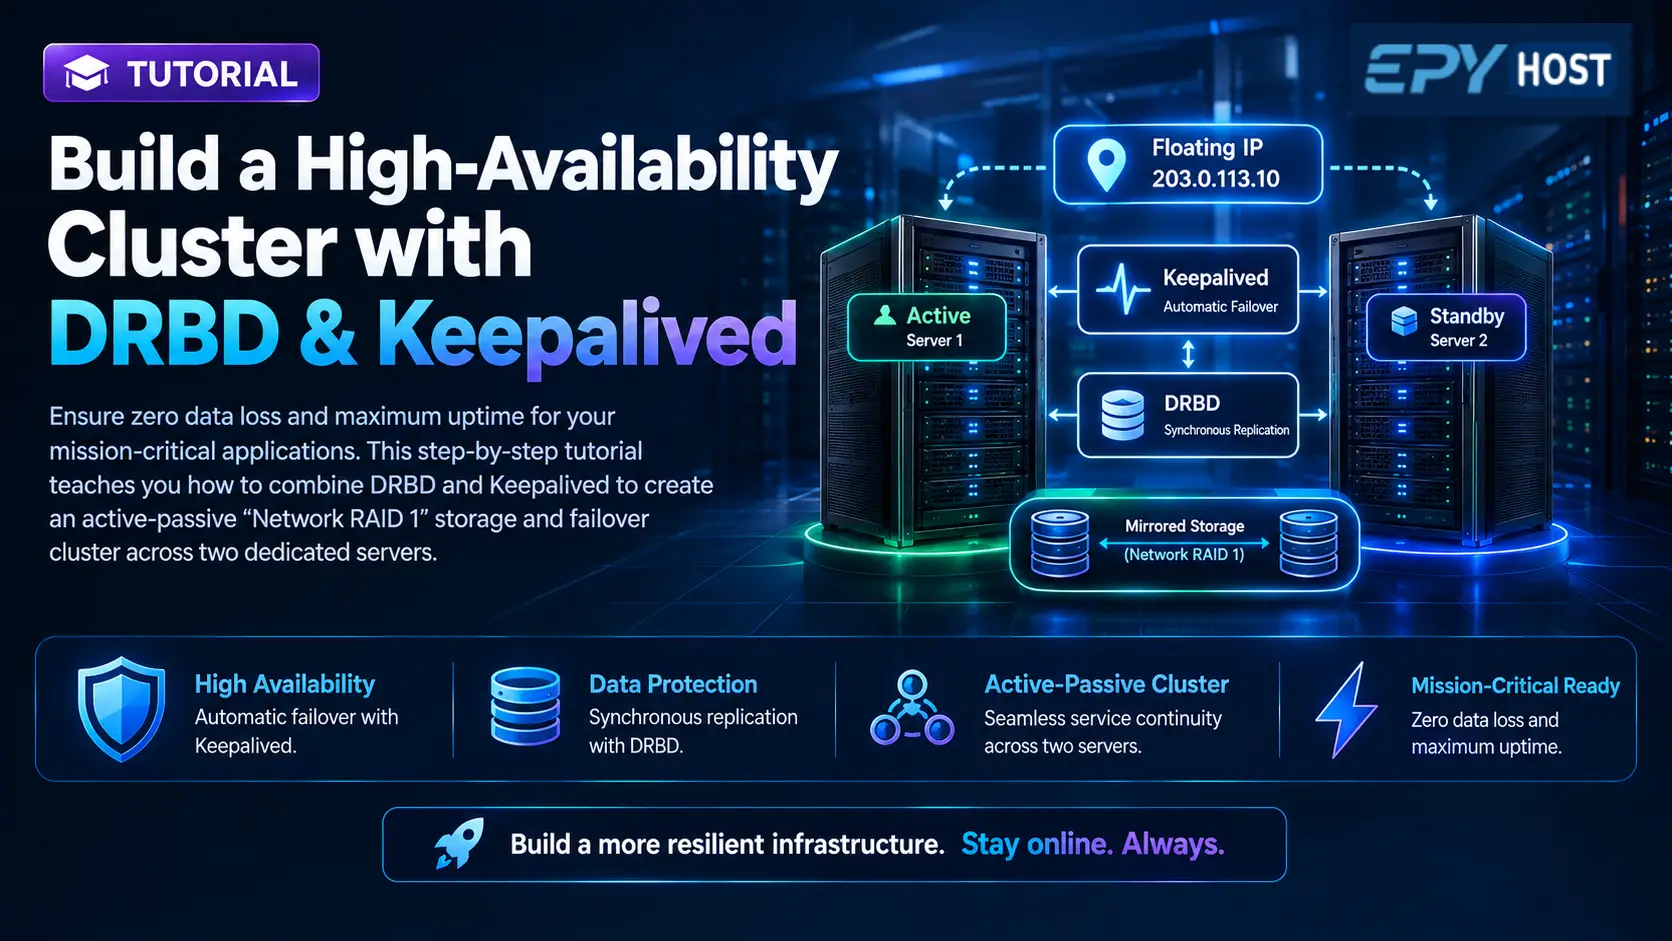
When hosting mission-critical applications or databases on a dedicated server, a single hardware point of failure is unacceptable. While application-level replication (like MySQL Master-Slave or Galera) exists, it is incredibly complex to manage, prone to split-brain scenarios, and completely useless if the underlying application files or configurations are lost during a drive failure.
To achieve true enterprise-level redundancy without investing in an expensive Storage Area Network (SAN), bare-metal administrators use DRBD (Distributed Replicated Block Device) paired with Keepalived.
Think of DRBD as a "Network RAID 1." It operates at the kernel level, intercepting every block of data written to a hard drive on your Primary server and synchronously replicating it over the network to a Secondary server. If the Primary server catches fire and dies instantly, Keepalived automatically detects the failure, swings your public Floating IP to the Secondary server, mounts the perfectly mirrored drive, and resumes your services in seconds.
In this tutorial, you will learn how to build this bulletproof active-passive High-Availability (HA) architecture using two EPY Host dedicated servers.
What You'll Learn
Prerequisites and Architecture Overview
Preparing the Block Storage Devices
Installing and Configuring DRBD
Initializing and Syncing the DRBD Resource
Formatting and Mounting the Replicated Drive
Automating Failover with Keepalived
Testing the High-Availability Failover
Prerequisites and Architecture Overview
To build this cluster, you will need two identical or similarly spec'd dedicated servers running Ubuntu 24.04 or AlmaLinux 9 (this guide uses Ubuntu).
The Architecture Breakdown:
Node1 (Primary): IP
10.0.0.1(Private) /203.0.113.1(Public)Node2 (Secondary): IP
10.0.0.2(Private) /203.0.113.2(Public)Floating IP (VIP):
203.0.113.100(The public IP your clients actually connect to).Dedicated Block Device: An identical, unformatted partition on both servers (e.g.,
/dev/nvme1n1or/dev/sdb1).
Important Note: DRBD replication generates massive amounts of continuous network traffic. You must route this replication traffic over EPY Host's internal private network (10.0.0.x) to avoid consuming your public bandwidth or exposing raw block data to the internet.
Ensure both servers can communicate over the private network and that their hostnames are properly set in /etc/hosts:
10.0.0.1 node1
10.0.0.2 node2
Preparing the Block Storage Devices
DRBD requires a raw, unmounted block device on both servers. This can be an entire secondary NVMe drive, or a specific partition reserved for high availability.
Assuming you have a second drive named /dev/nvme1n1 on both node1 and node2, ensure it is completely blank. Do not format it with ext4 or xfs yet—DRBD will handle the lower-level block management first.
Run this on both nodes to wipe any existing filesystem signatures:
sudo wipefs -a /dev/nvme1n1
If you only want to use a partition, use fdisk or sgdisk to create an identically sized partition on both nodes (e.g., /dev/nvme1n1p1).
Installing and Configuring DRBD
Now, install the DRBD kernel modules and user-space utilities on both nodes.
sudo apt update
sudo apt install drbd-utils -y
Next, we need to define the DRBD "resource." A resource dictates which drives to replicate, what network ports to use, and how to handle split-brain situations.
Create a new configuration file for your cluster resource (let's call it data) on both nodes:
sudo nano /etc/drbd.d/data.res
Paste the following configuration into the file on both servers:
resource data {
    protocol C;
    # Define disk behavior on error
    disk {
        on-io-error detach;
    }
    # Split-brain recovery policies
    net {
        after-sb-0pri discard-zero-changes;
        after-sb-1pri discard-secondary;
        after-sb-2pri disconnect;
    }
    # Define Node 1
    on node1 {
        device /dev/drbd0;
        disk /dev/nvme1n1;
        address 10.0.0.1:7788;
        meta-disk internal;
    }
    # Define Node 2
    on node2 {
        device /dev/drbd0;
        disk /dev/nvme1n1;
        address 10.0.0.2:7788;
        meta-disk internal;
    }
}
Understanding the Protocol: protocol C; means strictly synchronous replication. A write operation is not considered finished on node1 until node2 confirms it has also received and written the block. This guarantees zero data loss if a node crashes.
Initializing and Syncing the DRBD Resource
With the configuration matching on both servers, you must initialize the metadata that DRBD uses to track block changes.
Run these commands on both node1 and node2:
# Create the DRBD metadata on the raw disk
sudo drbdadm create-md data
# Bring the DRBD resource online
sudo drbdadm up data
At this point, DRBD is running, but neither server knows who has the "correct" initial data. They are both in a Secondary/Secondary state. We must force node1 to become the master (Primary) and overwrite node2 with its blank state.
Run this command only on node1:
sudo drbdadm primary --force data
The initial synchronization will immediately begin over your private network. You can monitor the real-time sync progress on either node by running:
drbd-overview
# OR
cat /proc/drbd
Wait for the sync state to reach UpToDate/UpToDate.
Formatting and Mounting the Replicated Drive
Now that DRBD is providing a unified, replicated virtual block device at /dev/drbd0, you can safely format it.
Run this only on node1 (since it is currently the Primary):
# Format the virtual device
sudo mkfs.ext4 /dev/drbd0
# Create a mount point
sudo mkdir -p /mnt/cluster_data
# Mount the device
sudo mount /dev/drbd0 /mnt/cluster_data
You can now write files, databases, or Docker volumes into /mnt/cluster_data. Every byte written here is instantly mirrored to node2.
-
Important: Do not add this mount to your
/etc/fstabon either node. DRBD devices can only be mounted on the server holding the "Primary" role. If node2 boots and tries to mount/dev/drbd0while it is still Secondary, the boot process will fail. Mounting will be handled dynamically by Keepalived.
Automating Failover with Keepalived
Currently, if node1 dies, node2 has the data, but it is just sitting there as a Secondary node. We need an automated watchdog to promote DRBD, mount the drive, and take over the Floating Public IP.
Install Keepalived on both nodes:
sudo apt install keepalived -y
1. Create the Keepalived State Scripts
Keepalived will execute bash scripts when a node becomes the MASTER or BACKUP.
Create a script to run on promotion on both nodes (/etc/keepalived/master.sh):
sudo nano /etc/keepalived/master.sh
#!/bin/bash
# Promote DRBD to Primary and mount the data
drbdadm primary data
mkdir -p /mnt/cluster_data
mount /dev/drbd0 /mnt/cluster_data
# (Optional) Start your application, e.g., systemctl start mysql
Create a script to run on demotion on both nodes (/etc/keepalived/backup.sh):
sudo nano /etc/keepalived/backup.sh
#!/bin/bash
# (Optional) Stop your application, e.g., systemctl stop mysql
# Unmount the data and demote DRBD
umount /mnt/cluster_data
drbdadm secondary data
Make both scripts executable:
sudo chmod +x /etc/keepalived/*.sh
2. Configure Keepalived
On Node 1 (Master), edit /etc/keepalived/keepalived.conf:
vrrp_instance VI_1 {
    state MASTER
    interface eno1             # Your public network interface
    virtual_router_id 51
    priority 100               # Higher priority makes it the preferred master
    advert_int 1
    authentication {
        auth_type PASS
        auth_pass secret123
    }
    virtual_ipaddress {
        203.0.113.100          # The shared Floating IP
    }
    notify_master "/etc/keepalived/master.sh"
    notify_backup "/etc/keepalived/backup.sh"
    notify_fault "/etc/keepalived/backup.sh"
}
On Node 2 (Backup), create the same file, but change state MASTER to state BACKUP, and priority 100 to priority 90.
Start Keepalived on both nodes:
sudo systemctl enable --now keepalived
Testing the High-Availability Failover
Your active-passive HA cluster is fully operational. To verify the system works in a crisis, let's simulate a catastrophic hardware failure.
Connect to your Floating IP (
203.0.113.100) via SSH. You will land on node1.Write a test file:
echo "Cluster is working!" > /mnt/cluster_data/test.txtSimulate a total crash on node1 by forcefully stopping the network or rebooting the server:
sudo systemctl stop networkorsudo shutdown -h now.Immediately ping the Floating IP (
203.0.113.100). It will drop a few packets, and then Keepalived on node2 will assume control.SSH into node2 via the Floating IP.
Run
drbd-overviewto confirm node2 promoted itself to Primary.Check your data:
cat /mnt/cluster_data/test.txt. Your data is perfectly intact and accessible.
When node1 comes back online, it will boot as a Secondary node, resync any blocks written while it was dead, and wait in standby until another failure occurs.
Final Thoughts
Building a "Network RAID 1" cluster with DRBD and Keepalived is the gold standard for dedicated server High Availability. By utilizing bare-metal block replication over a private network, you completely remove the complexity of application-level syncing. Whether you are running complex legacy applications, large databases, or critical file servers, this architecture guarantees that a hardware failure will never result in data loss or extended downtime.